As any Logos user already knows, Logos’ highlighting and notes offer a lot of freedom. Within Logos’ highlighting options, though, there are some special features you may not know about.
Create your own highlighting style
I’m a rather boring note-taker. I like to keep my notes minimally obtrusive while still easy to scan. (Although scanning becomes less important with later features. Keep reading.) Because of this, the standard highlighting tools are a bit much for me. Especially the “inductive” palette—fun, but a bit overwhelming.
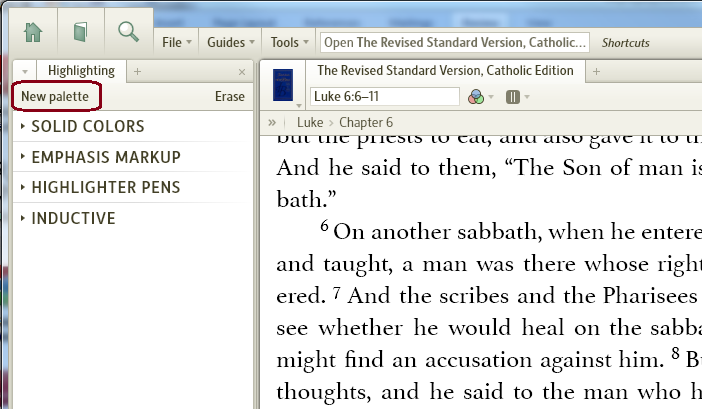
So let’s make our own highlighting style. In the Highlighting pane, click “New palette” in the upper left.

Name it whatever you want, but it will make sense later to name it after what you plan to highlight. I named mine “Best Bible Passages.” Now hover over your new palette and a dropdown button will appear to the right. Click this and select “Add a new style.”

You are sort of on your own here. There are so many great options for styling text to your exact specifications. You can do something as simple as enlarging any text you highlight:

Or as complex as the most terrifying induction style (not recommended):

Explore the different options in this new style menu, and feel free to go back and edit previous styles at any time. All notes highlighted with that style will be retroactively changed. If you really don’t want a style, you can delete it; you’ll have the option to restyle any annotation(s) in that style. Simply switch them to your favorite or most recently created style.

The best part: access all your highlights in one place
In my opinion, styling your highlighting, though fun, is really only a way to make the text more accessible. I like to think of myself as a romantic, but when it comes to highlighting, I am a complete utilitarian. But I told you how to create your own styles because the utility is wonderful.
To access all your highlights in one place, click the dropdown next to your new palette. At the bottom of the menu is the option “Save in:.” Clicking this provides a dropdown menu with every notes file in your library. You can select one of those options or one of the top two options: The first, “Palette-specific note file,” means Logos will create a notes file for you that shares the title of your palette. This is why I named my palette “Best Bible Passages”—now my notes file has the same name.

The second, “Most recent note file,” is a great method for organizing your thoughts if you’re doing research on a specific theme or topic. Especially if you plan to have a notes pane open while you work, it’s easy to simply highlight excerpts straight into your notes file. But be careful—if you want to access all the notes you’ve made with that highlighter, they’re going to be a bit harder to gather together if they’ve been left in various notes files.
*Notice that changing the “Save in:” location of a highlighting style does not move existing notes. So when you create a style, decide what you are going to do with it and select the appropriate save location so that you don’t have to try to move notes later.
Make it even easier
When you’re jumping from book to book following an idea, the last thing you need is an open highlights pane crowding your workspace. By clicking the dropdown arrow next to any style, you can set a “Shortcut key:.”

Click the corresponding dropdown arrow and select a letter. Now you can close the highlighting pane—all you have to do to highlight text is select your passage and press the chosen letter on your keyboard. With that one button press, you highlight the text in your preferred style and create a note in the file of your choice. Talk about easy.
Editing preset styles
One last thing while we’re on the topic. The preset styles have a significantly grayed out dropdown menu.

If you’d like to rename a preset palette or highlighting style, you can simply “Duplicate” the entire palette.

Now every style is editable, as is the palette itself.


Alex
It seems that this had to do with Verbum not being installed on my Kindle. I just installed it and the highlights are syncing now. The only downside is that I lost all my highlights from the time I installed Logos 5/Verbum on my desktop until today when I installed Verbum on my Kindle.
Since upgrading to Logos 5, none of the highlights I’ve made on my Kindle have synced with my PC. Does anyone else have this problem and/or a solution? Thank you!!
This is the first I have heard of such a problem. I don’t think I can answer your question, but I recommend you contact our Customer Support team at 800-875-6467. The wait is usually quite short, and we can cut out the middle man. Be sure to tell them exactly what you are using (Verbum/Logos/Bible on desktop or mobile).
I would love to know more, also, if you have time. And when you get it figured out, please be sure to post something here for everyone else. Thanks!
Good luck!
Thanks so much Alex! I’ll give them a try. It’s not a huge issue, but I’d like to get it figured out if possible. Have a great day!